Inspiration
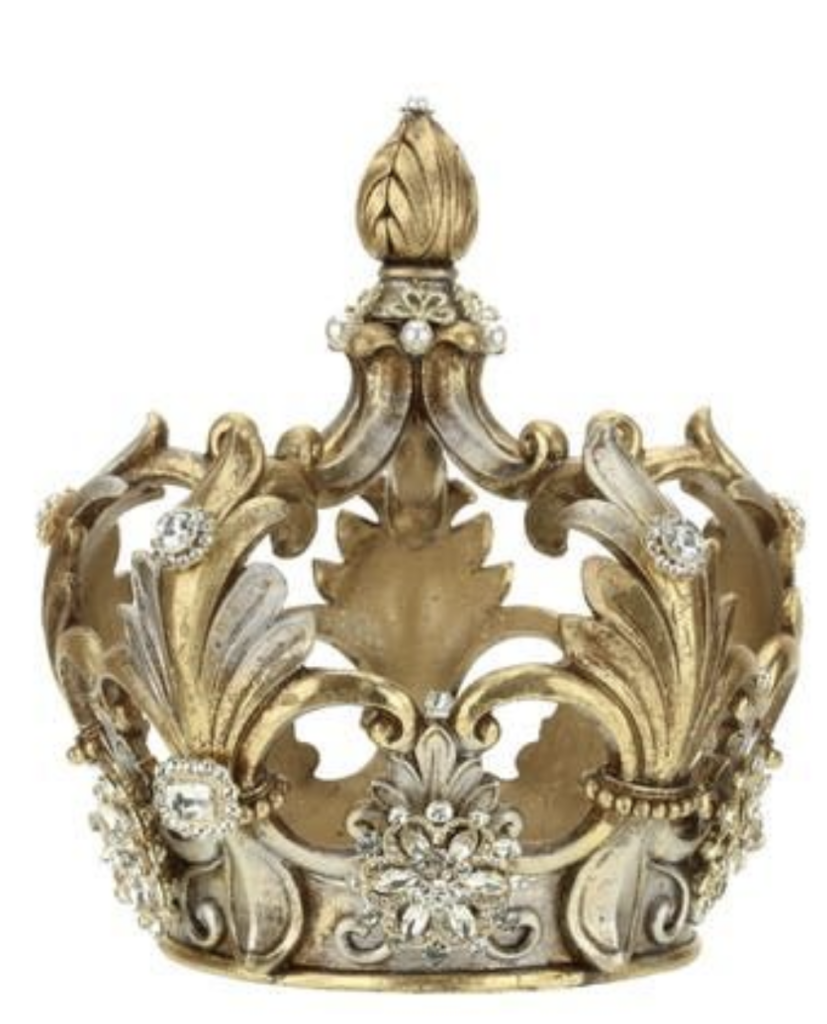
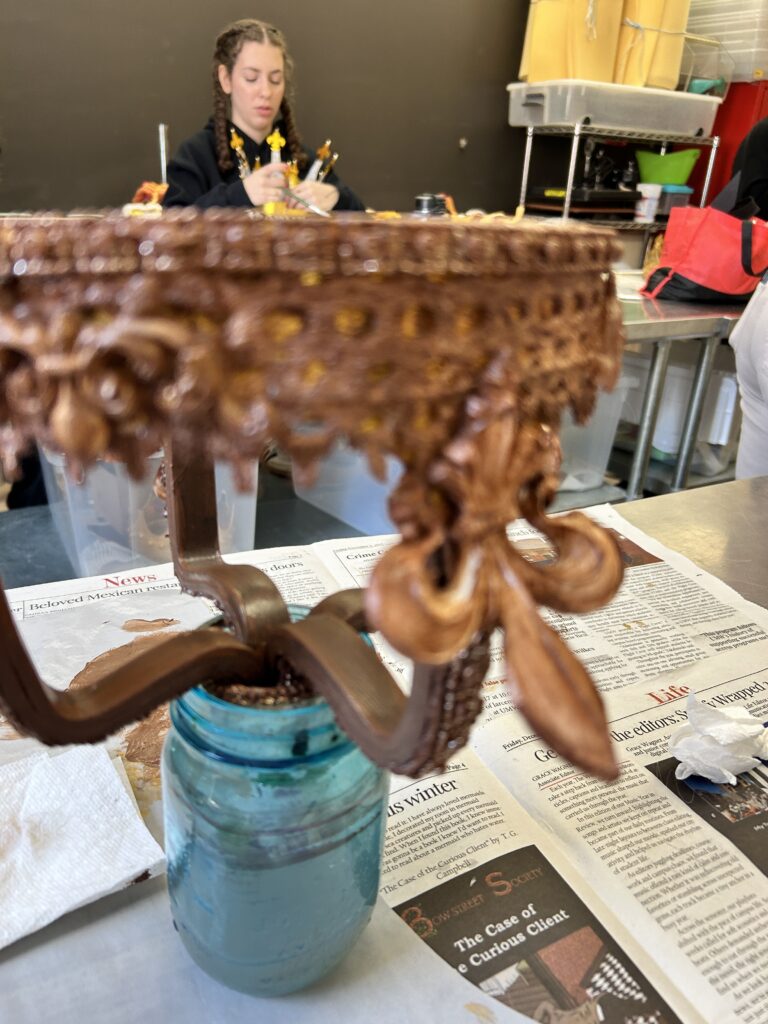
For this crown project, I wanted to focus on the different fillagree textures and patterns found on the crown above. I wanted to challenge my building skills and attempt to recreate the arches leading to the monde and ball on top. Other inspiration came from the pictures from the designer. I loved the fleur de lis that were represented on many of the examples, as well as the heaviness in the textures.
Beginning Build Stage
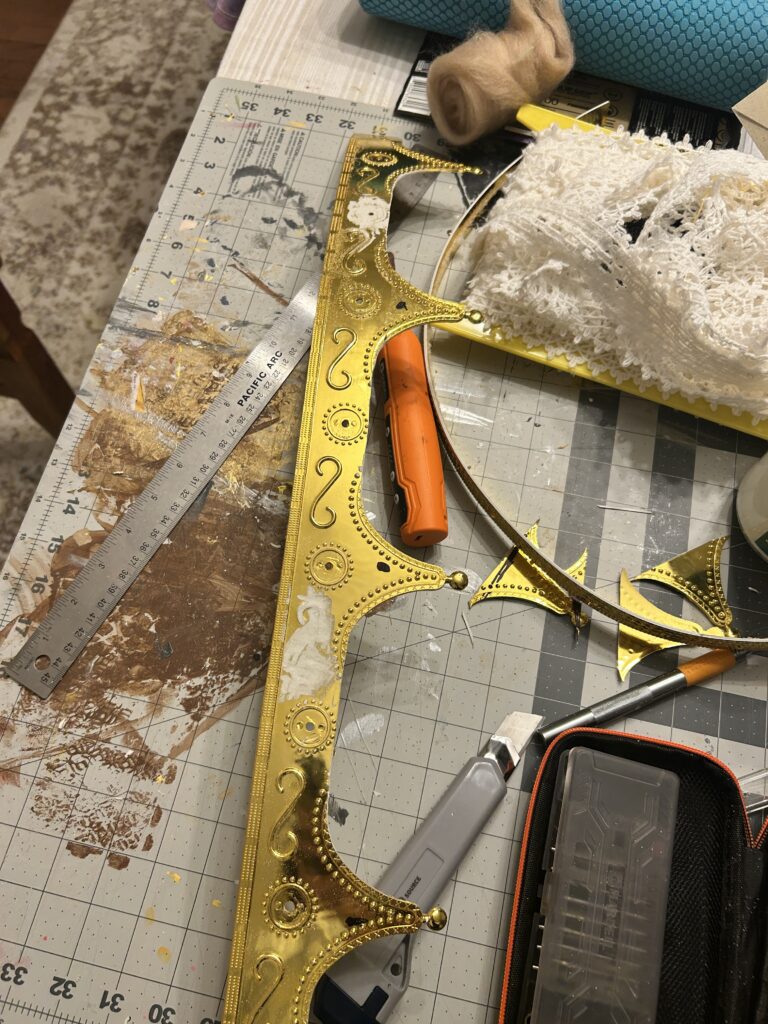
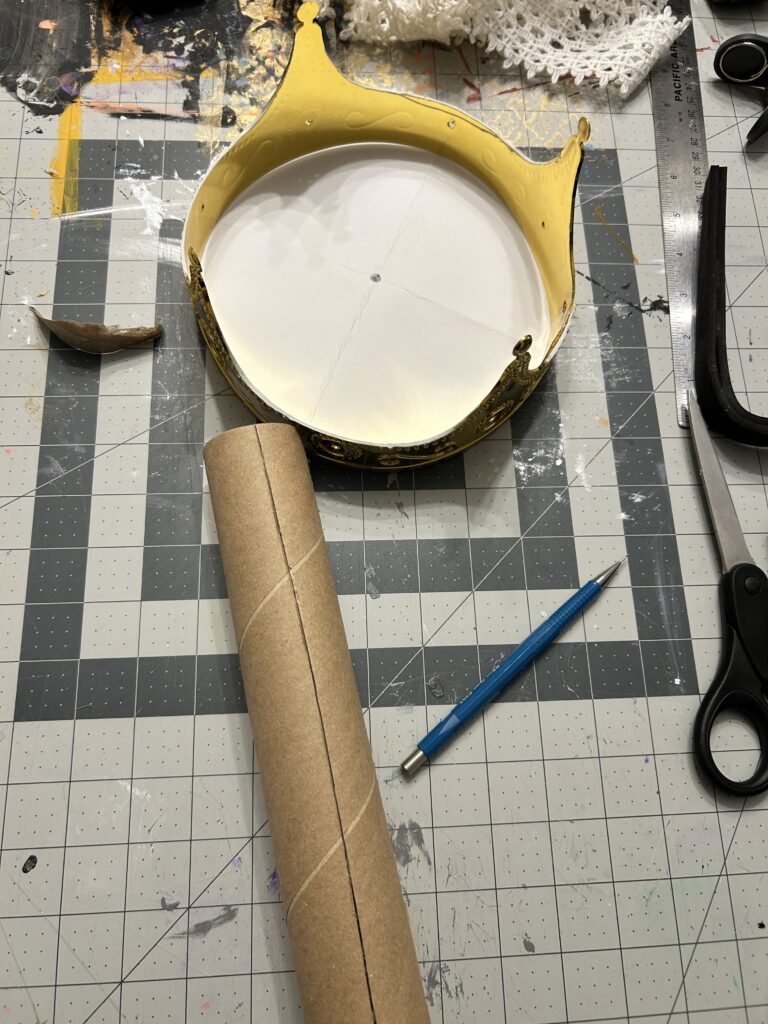
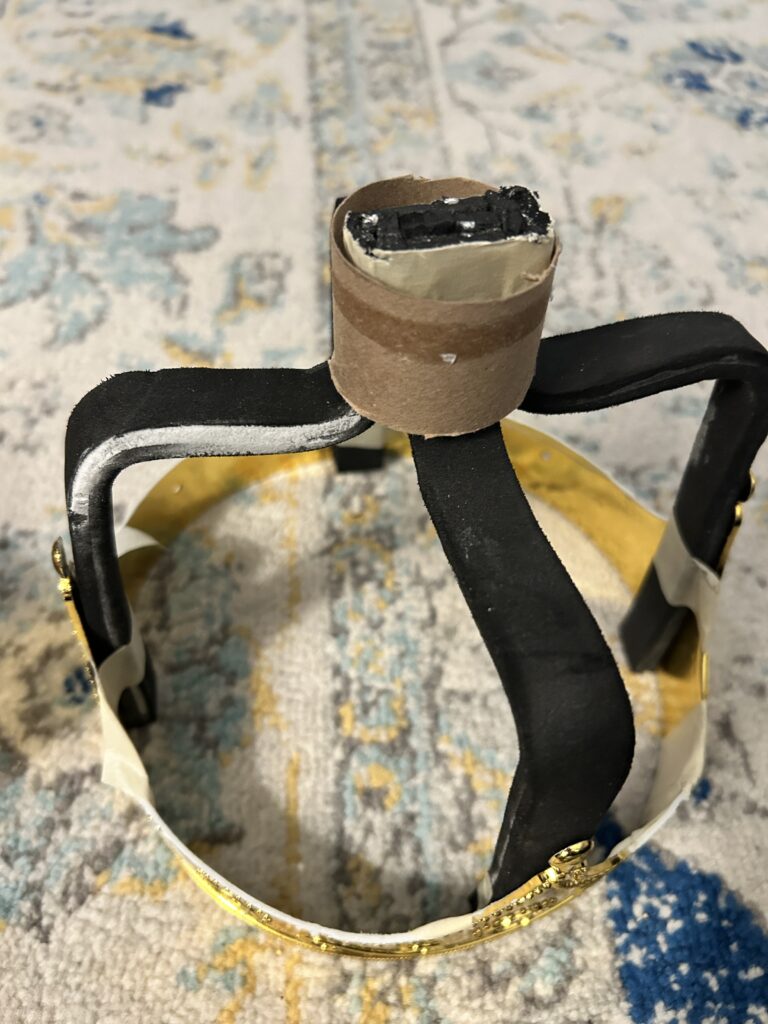
I began by cutting the base of the crown off since I did not want to use or have to disguise the texture that came on the base crown. My next step was to use EVA foam and wire to create the arches. I first cut down two pieces of foam to 2/3″ and super glued the wire in between the foam. I made all four straight and left them under weighted items over night. I then found the center of the crown and created a quick middle support beam to act as a guide to shaping my arches. I shaped one to my liking and used it as a template to shape the others. I had them all meet in the middle and secured them with glue and tape. The bottoms portions were secured with hot glue.
Creating the Fleur De Lis
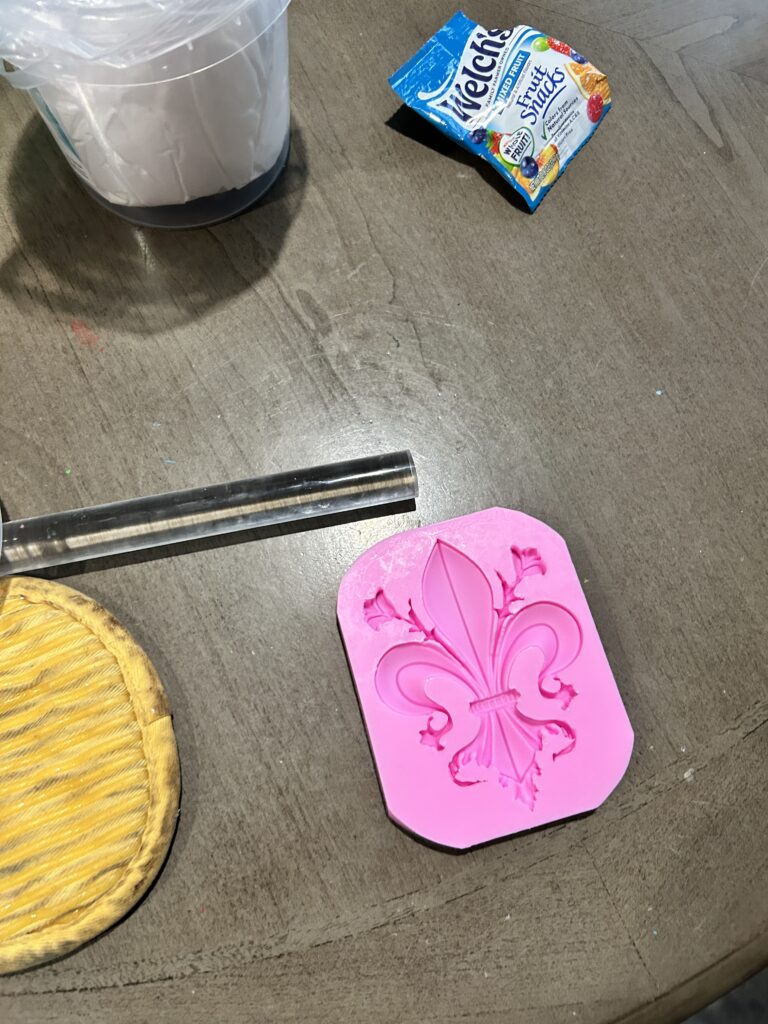
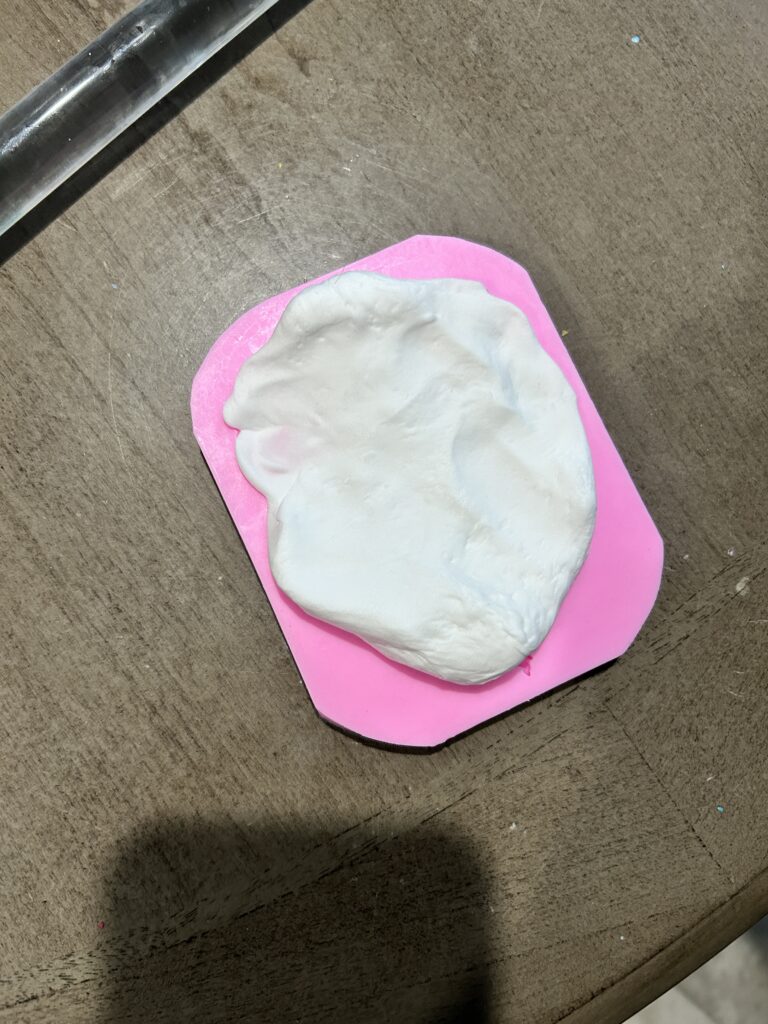
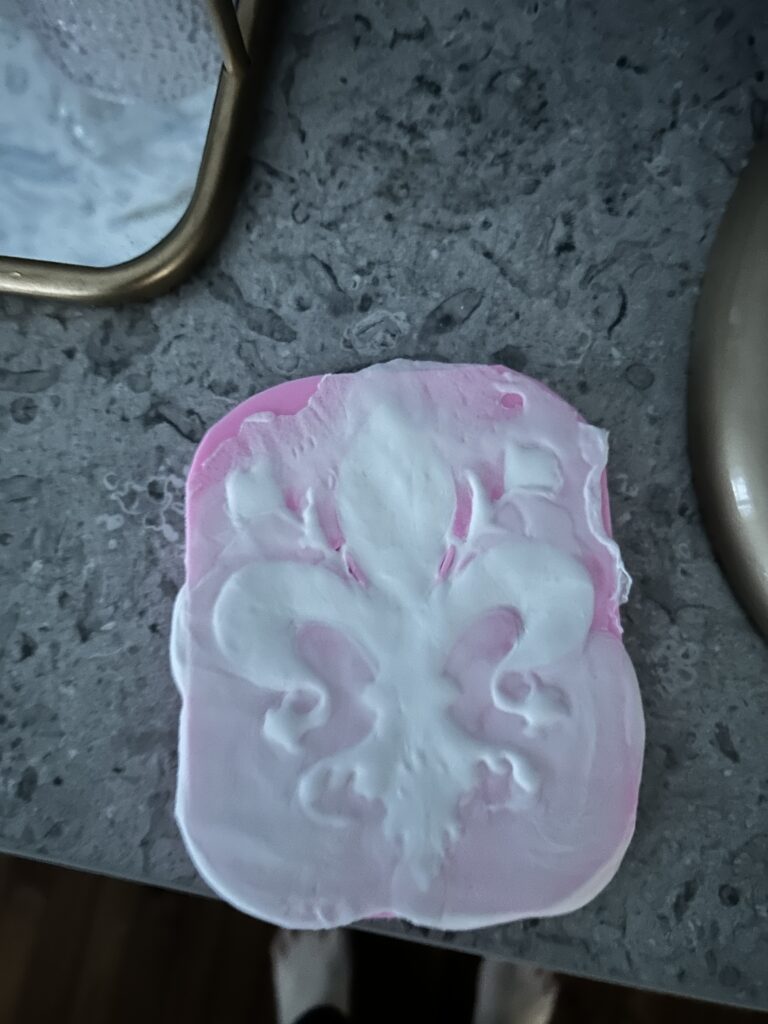

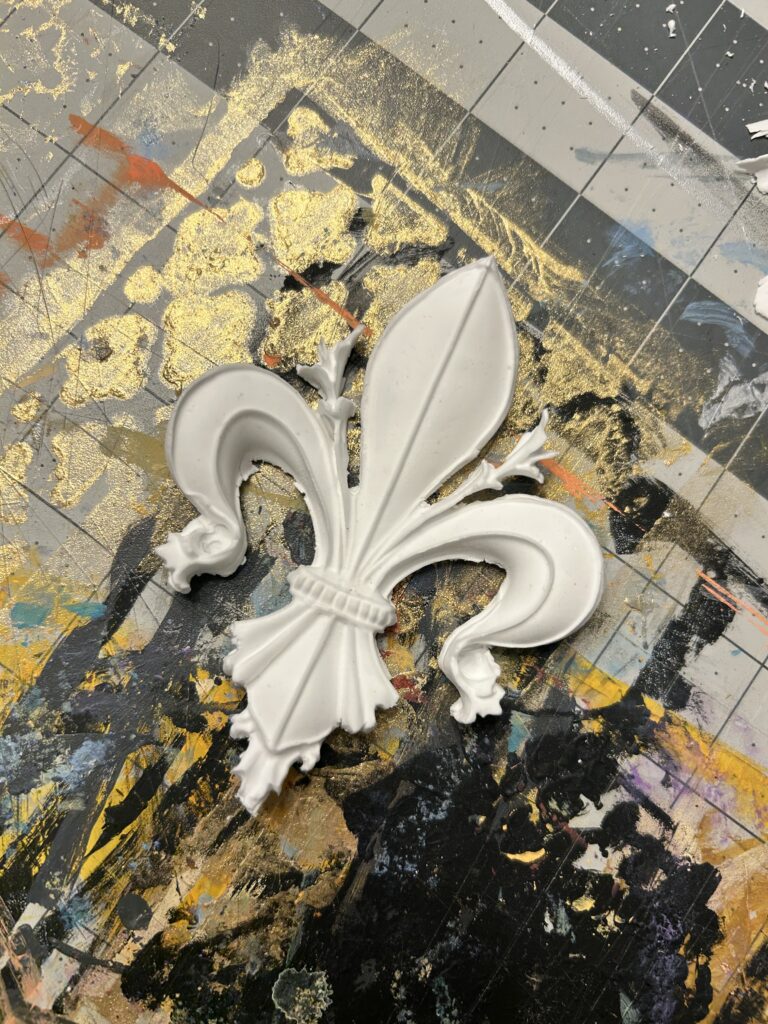
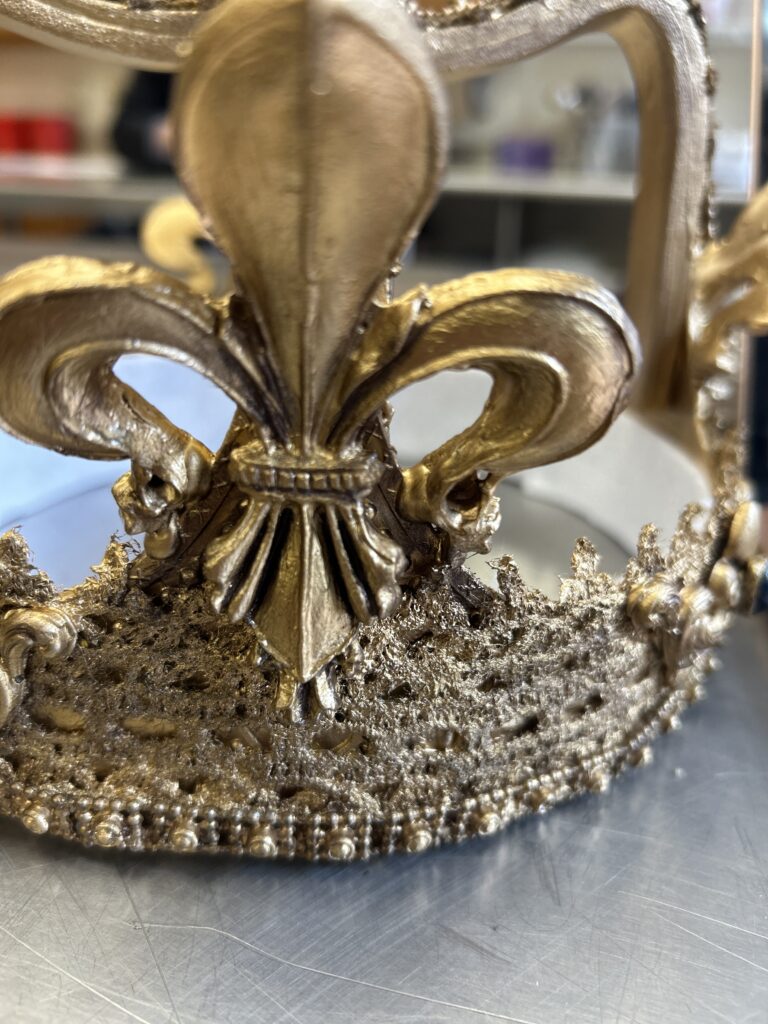
I next began to create the fleur de lis as I knew the foam clay would take time to dry out and cure. I found a silicone mold and after a few failed attempts, found that taking the majority of extra off the back led to the mold drying faster and allowing it to be released sooner. I then cut the edges out carefully with an exacto knife.
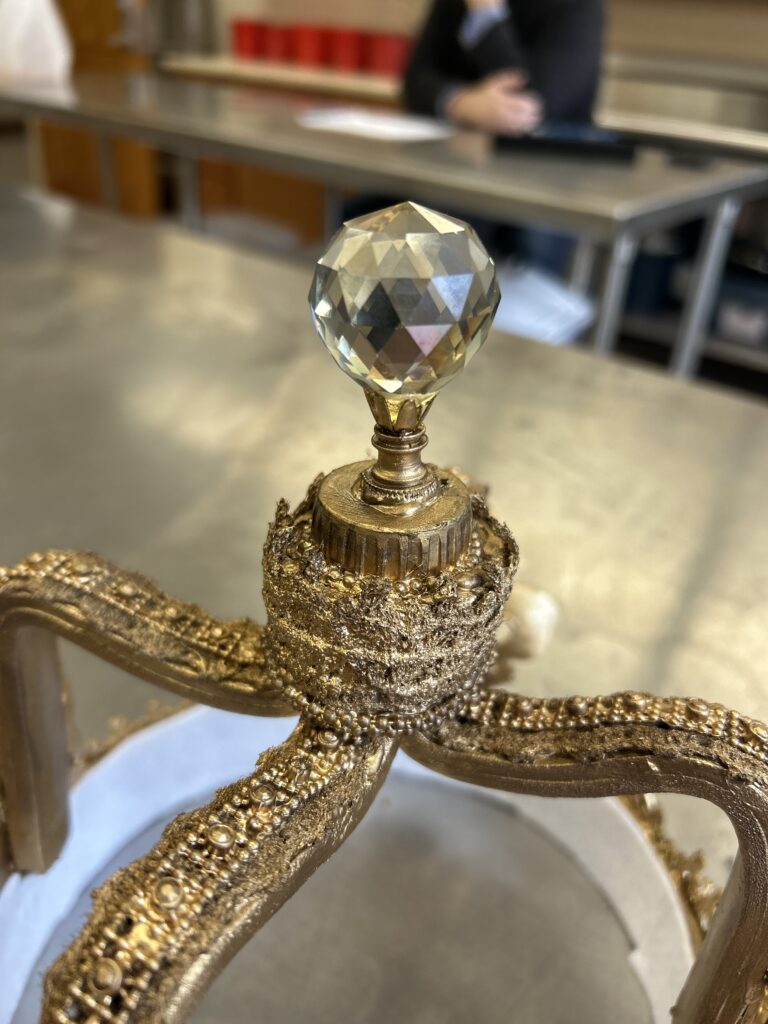
Building Up the Top of the Crown
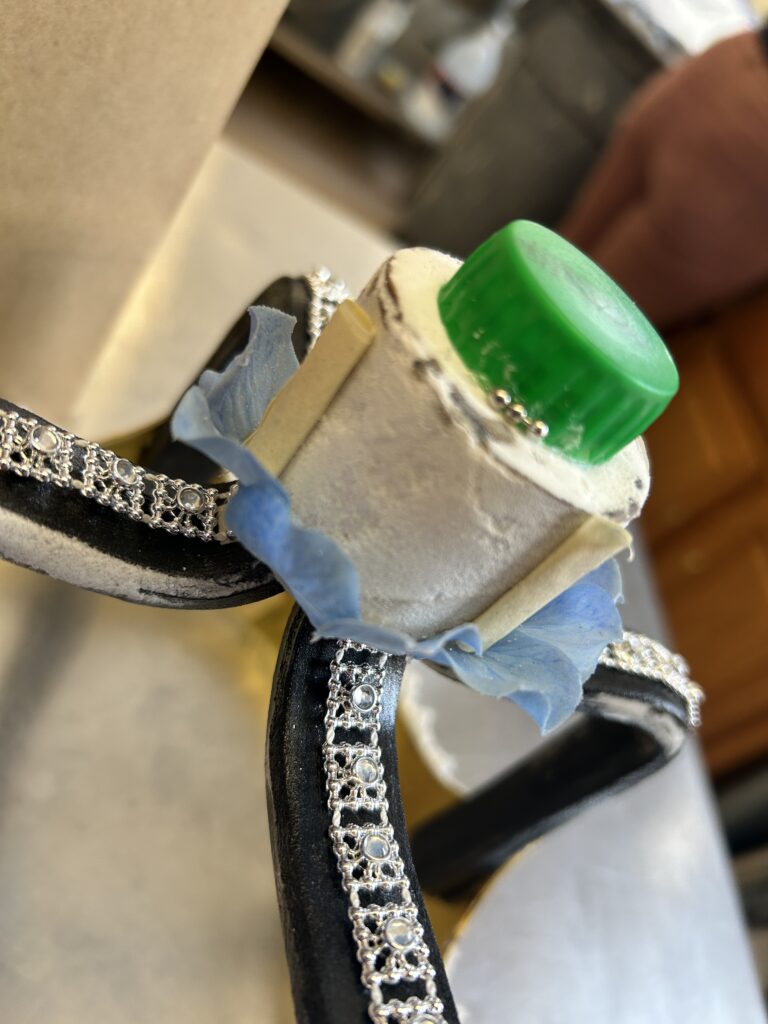
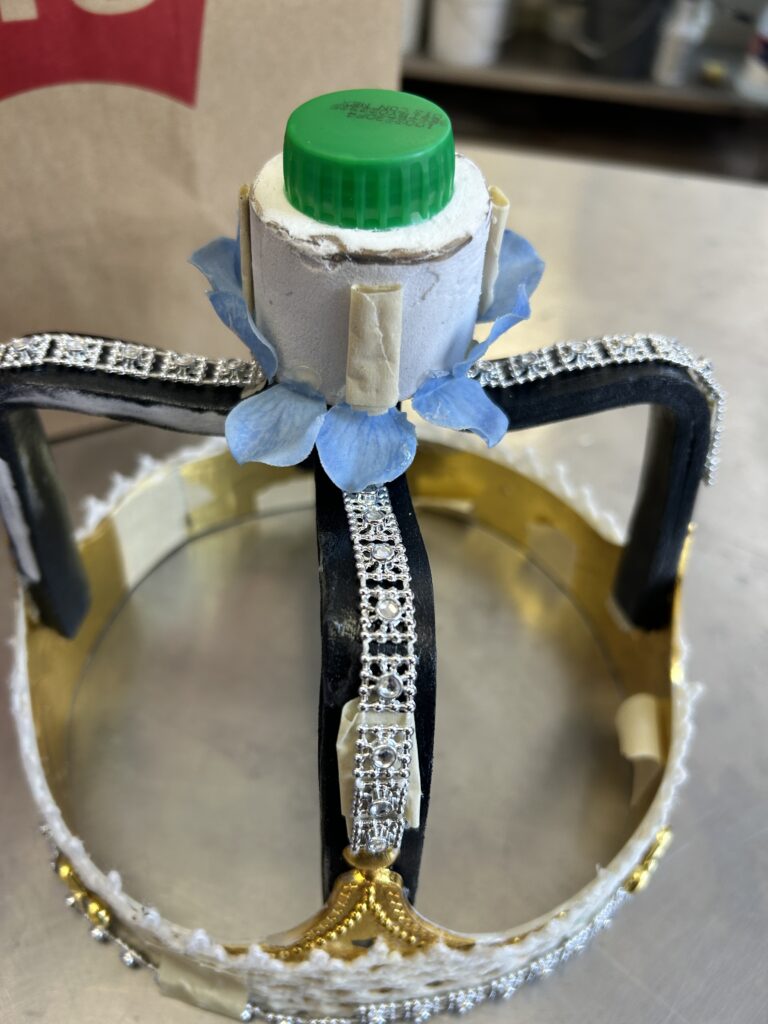
I began by taking a piece of a toilet paper roll and making a top for it. I coated the roll in a lightweight spackle to smooth out the top and sides, then after it drying, a coat of Crystal Gel. I topped it with a sode bottle top to add a bit more height. I finally attached it with super glue to the top of the arches.
Adding Texture
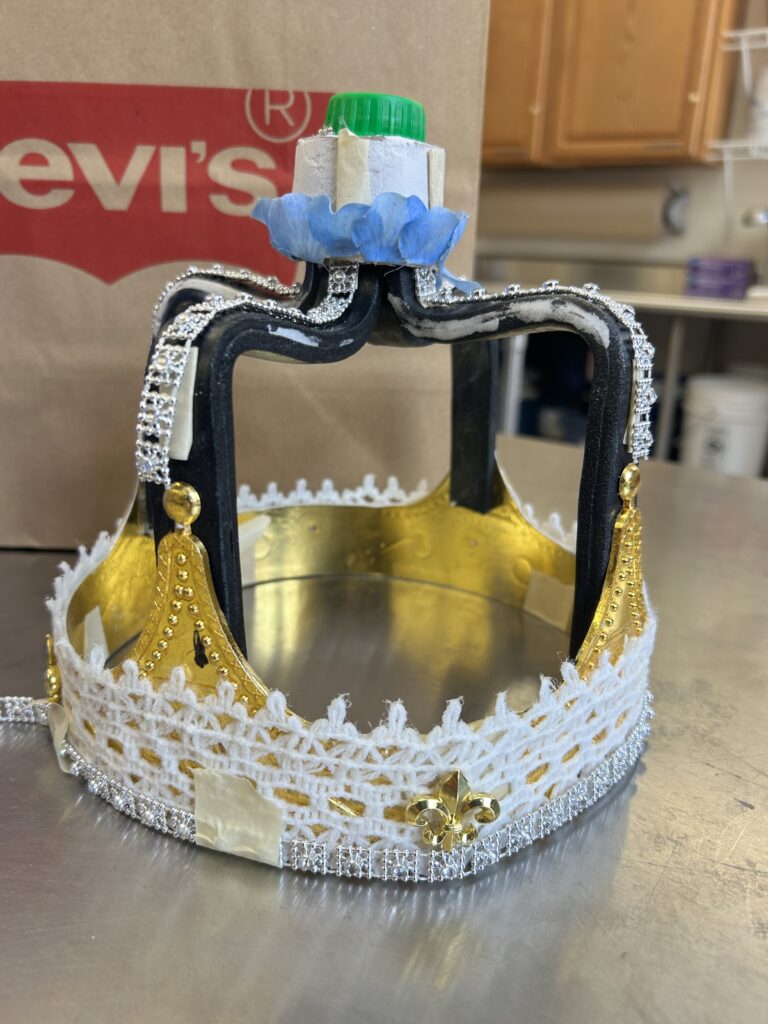
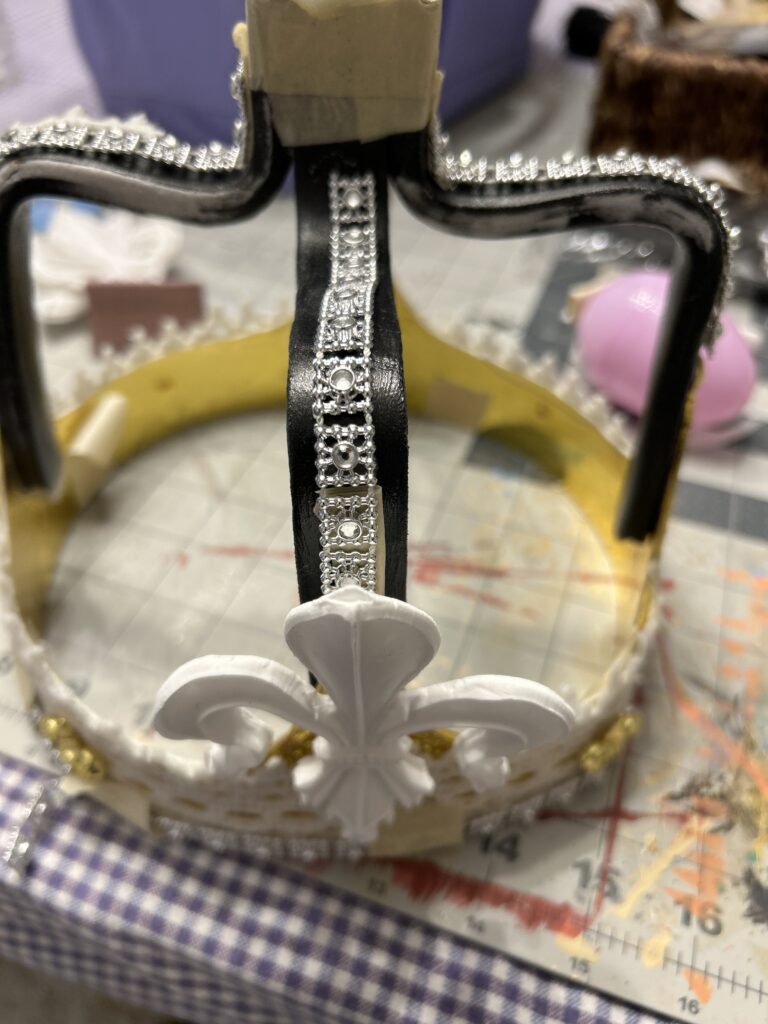
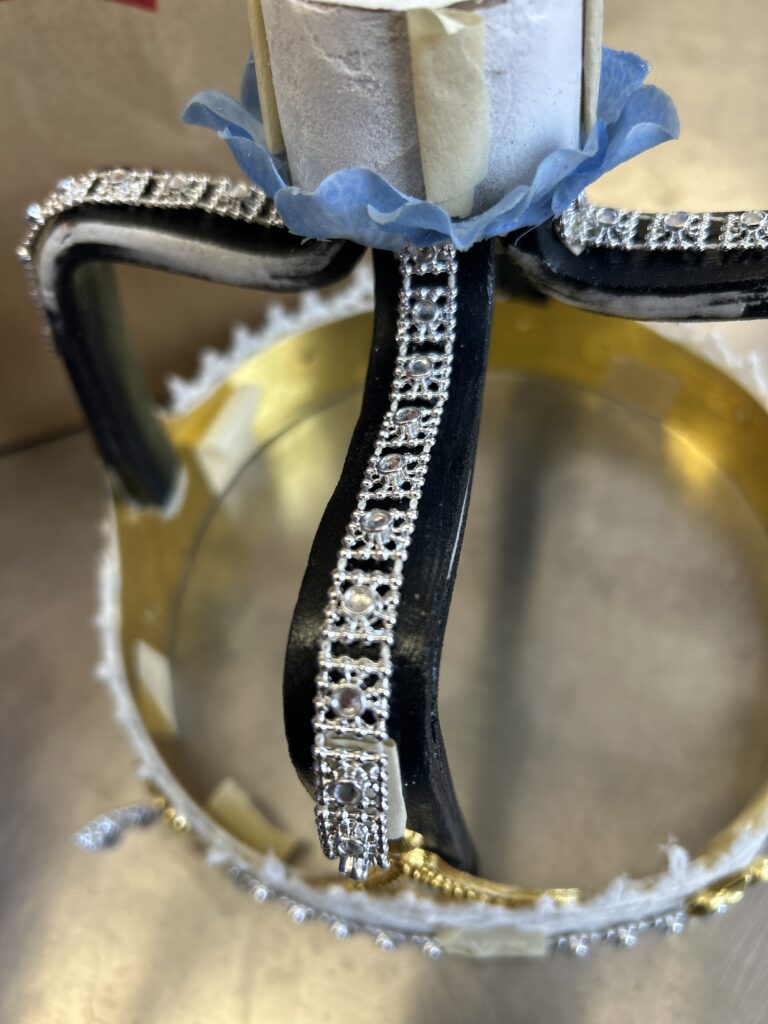
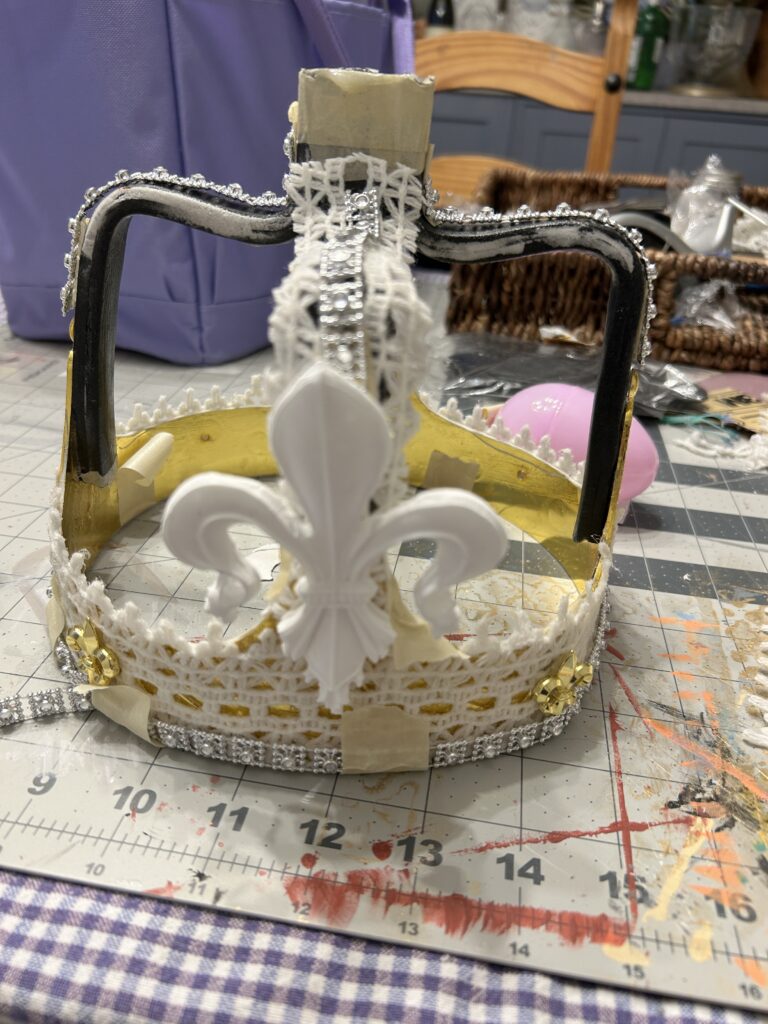

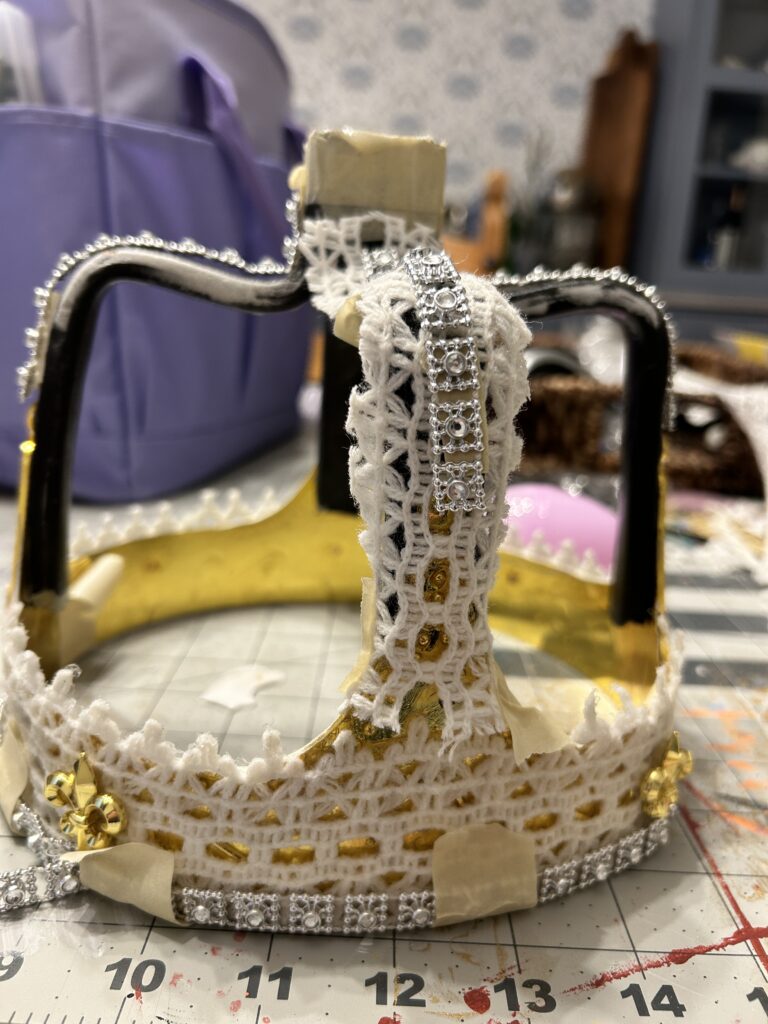
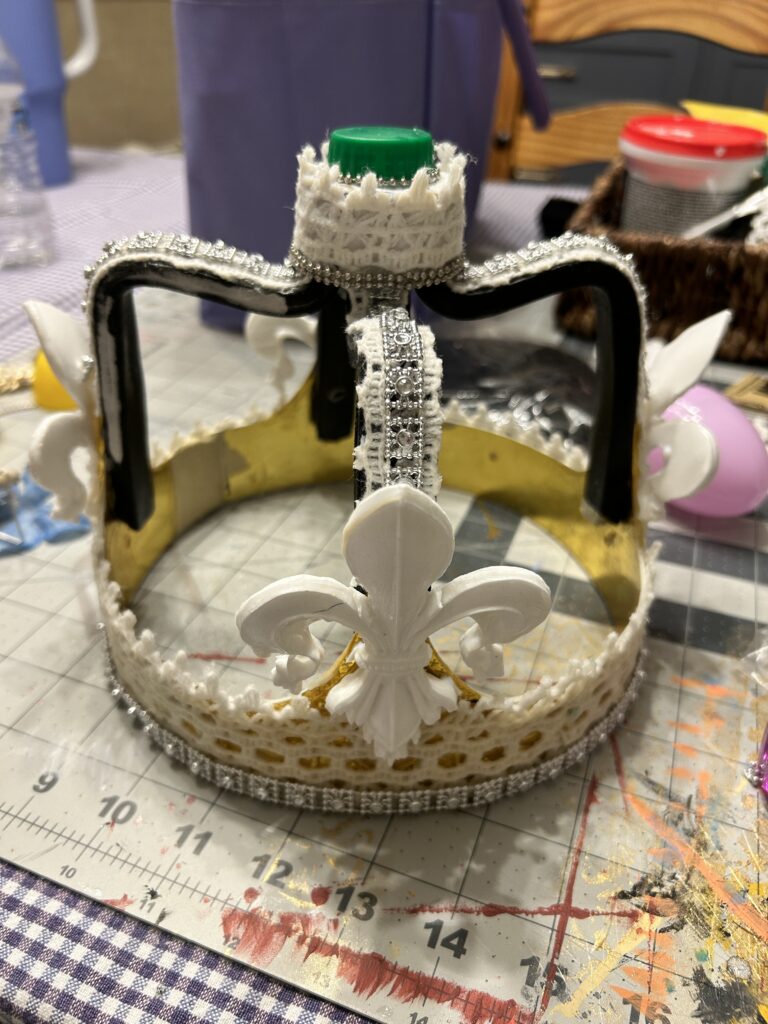
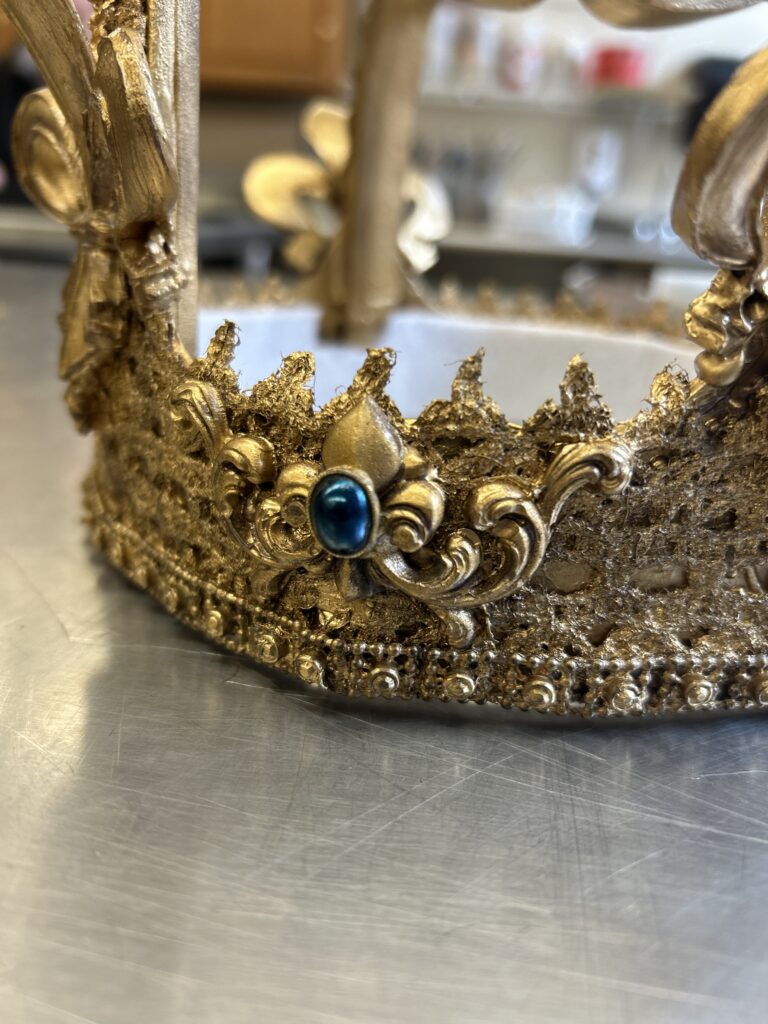
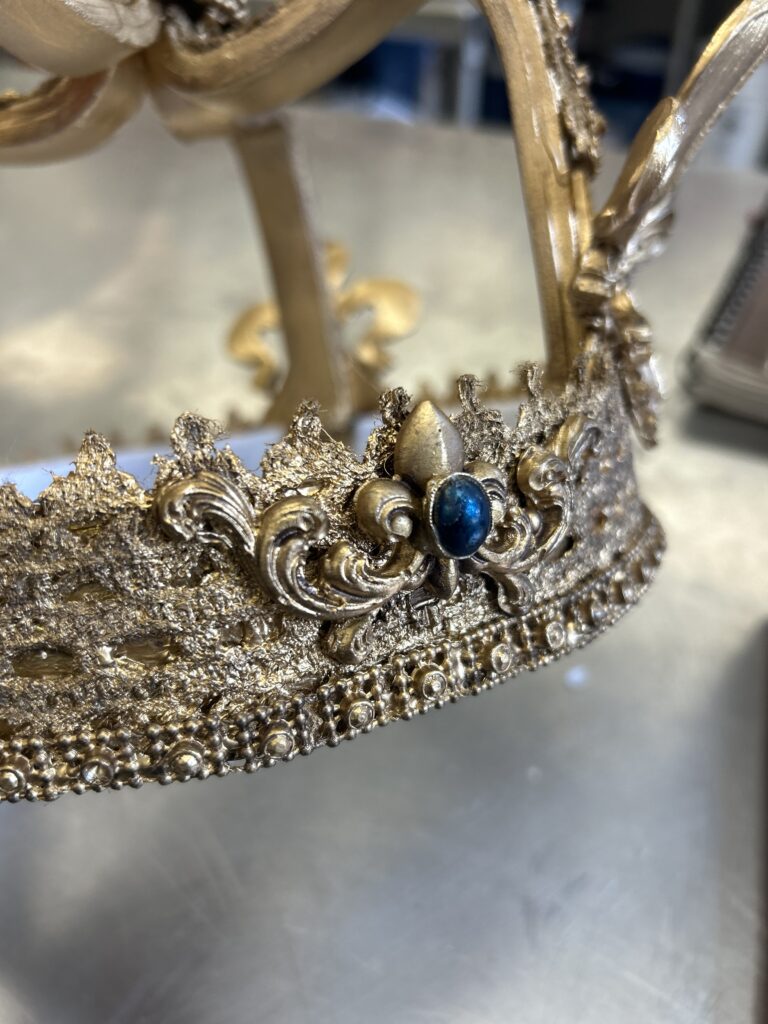
I used a crocheted lace around the perimeter of the crown to add dimension to the metal. I then used the silver trim to finish the bottom of the crown. I wanted to keep the same texture and detail drawing your eyes up the crown so I added the silver trim to the arches. After the suggestion from the professor, I added some of the crochet trim to the arches as well. I had to play around with width of the trim and decided (eventually) to not have it wrap all the way to the underside of the arch. I added more of the crochet trim to the top piece to mimic the small pieces sticking above the rim of the bottom section of the crown.
Painting/Finishing Touches
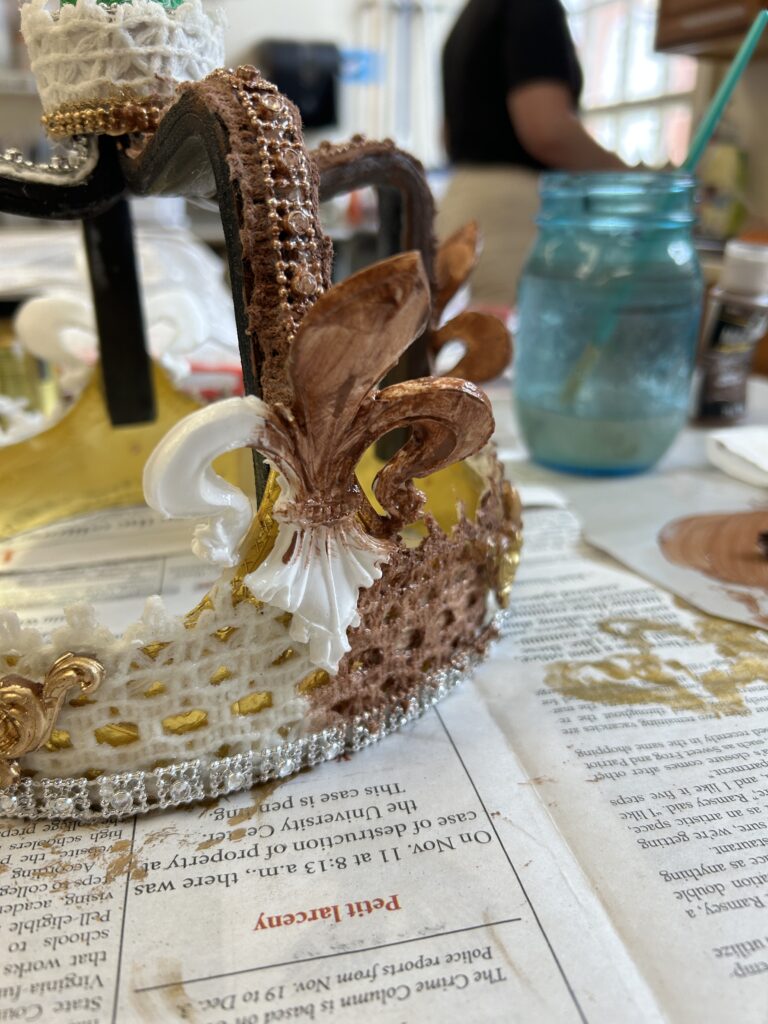
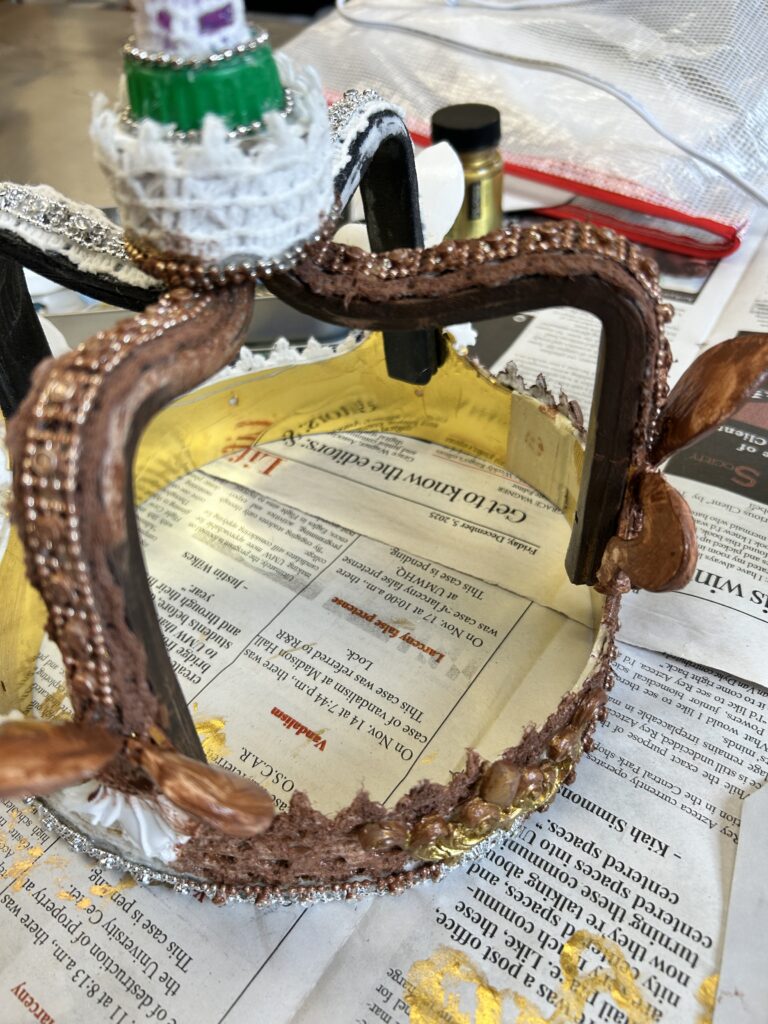
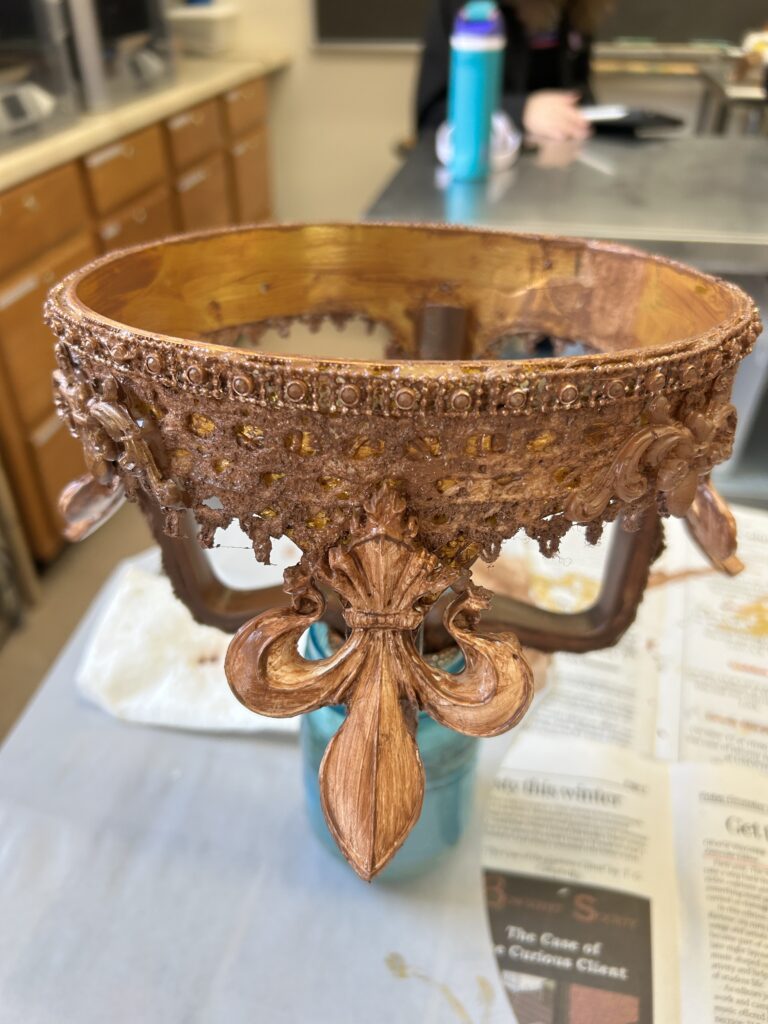
I started with a base layer of a satin brown acrylic paint. I wanted to coat the crown with a darker color that would create shadows under the gold if I missed saturating a part of the crown. I then used an alcohol based liquid gold leaf paint. I did two coats of the gold. I then went in with a dark bronze color of rub and buff to add shadows in the crevices of the textured pieces.
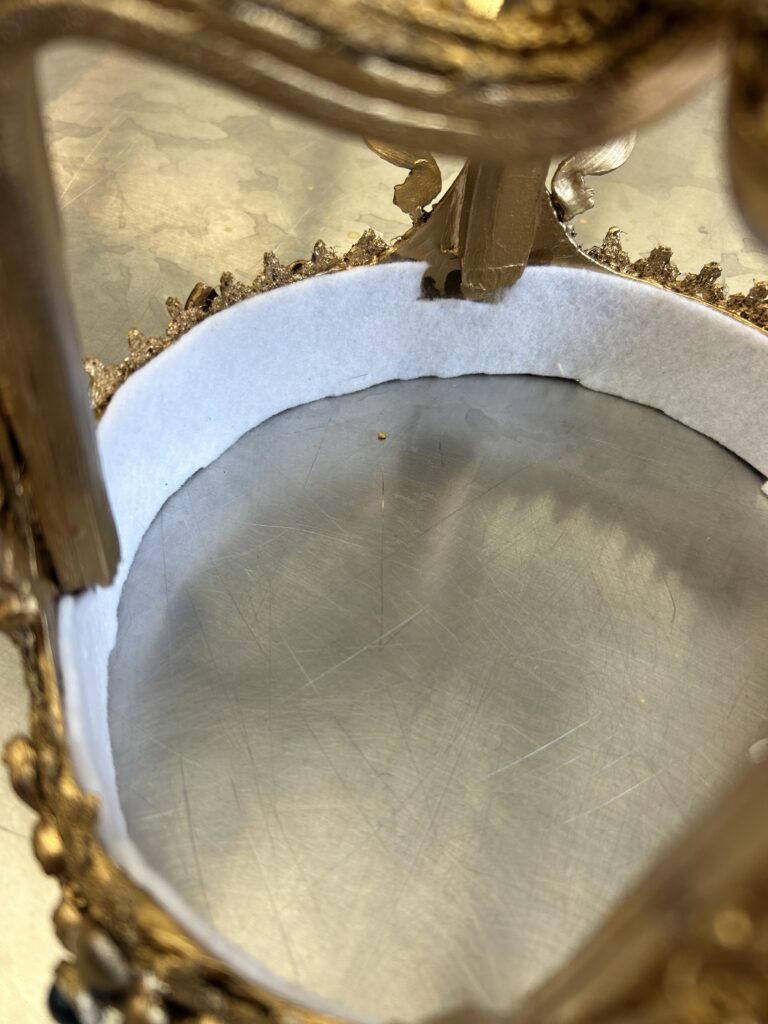
To finish the crown, I gave it a coat of Crystal Gel to give it some more shine. I lined the inside of the crown with felt for comfort for the actor. Finally, I added the top crystal and added the blue stones to the smaller fleur de lis on the band of the crown.